Construction
 This layout was conceived of when two things happened in rapid
sucession,
This layout was conceived of when two things happened in rapid
sucession,
1. I purchased a supposedly defunct Marklin 0-6-0 tank engine
at the local hobby store for $5, which I was able to coax back to
life, and
2. I saw a fairly nice, solid briefcase at a local thrift store.
The planning began.
As an avid armchair modeler, I
had plenty of small layouts planned, both
in my head, and on paper. I chose the tried
and true "Gore and Daphetid"
track plan for several reasons: I wanted a couple
of "industry" tracks, and
I wanted at least one trestle. John Allen
had a curved trestle on his high
line, but my extremly tight radiuses left no room
to put it.
Track
Plan
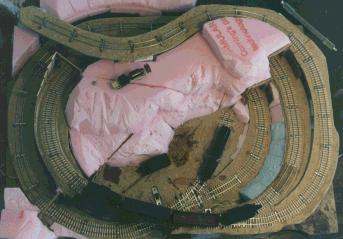
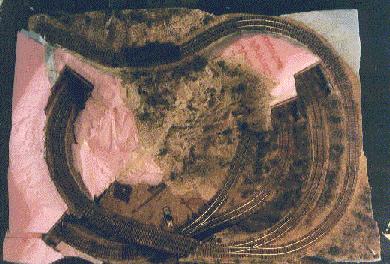
This first picture shows much of
my benchwork, which was created
by cutting a piece of 3/16ths masonite hardboard
to fit securely into
the bottom of my briefcase, then drawing the track
plan onto a
piece of 1/8th masonite, and, using the
"cookie cutter" method, cutting
the plan out, leaving a gap for the planned
bridge.
Shown above and below, I used
blue and pink 1" stryrofoam
insulation boards not only to create the
mountains, but also to
support the masonite roadbed at the correct
elevations.
I used Exacto knives and straight edge razor
blades to carefully
fit sections of the foam to the roadbed, and then
started cutting
until I had the shape I wanted.
My track is handlaid code 40 on
PC board ties. The turnouts were handlaid
using plans from the Nn3 data book. The ties
were glued down on the centerline
using ACC (superglue). I soldered the rails
to the PC ties, then stripwood was
cut to length and glued underneath the rails.
After everything was in, the wood was stained, and
the PC ties painted to match.
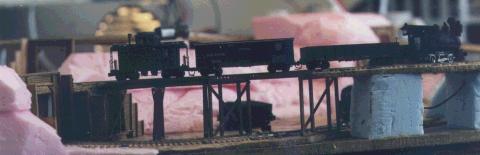
The tunnel portals and cribbing were cut from
scribed wood siding,
and scale lumber was used for the supports.
Everything was stained Teak,
and then glued in place, often long before the
mountain.
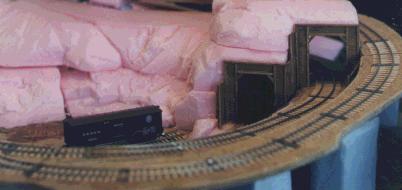
My techniques for creating
mountains may be a bit unorthodox,
but I like the effect. No plaster was used
in creating the mountains.
I just glued pieces of insulating foam down using
carpenters
wood glue, then carved them to shape. To
cover the small gaps
between the one piece of foam and the next, or the
foam and the
hardboard, I just used pieces of masking
tape. When I had the shape
I wanted, I just painted over it all, using just
two colors: Sandstone
and Dunes Beige, both acrylic paints made by Delta
Ceramcoat.
I laid the paint on thick, and while it was still
wet, I sprinkled on various
shades of Woodland Scenics ground foam.
If you have questions about anything I have
covered here, feel that I have blatently
left something out, or just want to know more, feel free to
contact me.
nscalenarrowgauge@yahoo.com
Back to the
Nn3 page
